Add an extra questionnaire to the checkout process
This article explains how to create a questionnaire and link it in the checkout process. If you want to show the questionnaire only after checkout has been completed, please read this article.
1. Go to 'Create' in the grey bar on the left-hand side and then click 'Questionnaire'.
2. Click 'New questionnaire'.
3. Enter a title and click 'Save changes'.

Tip: choose a recognisable title related to the subject of the questions.
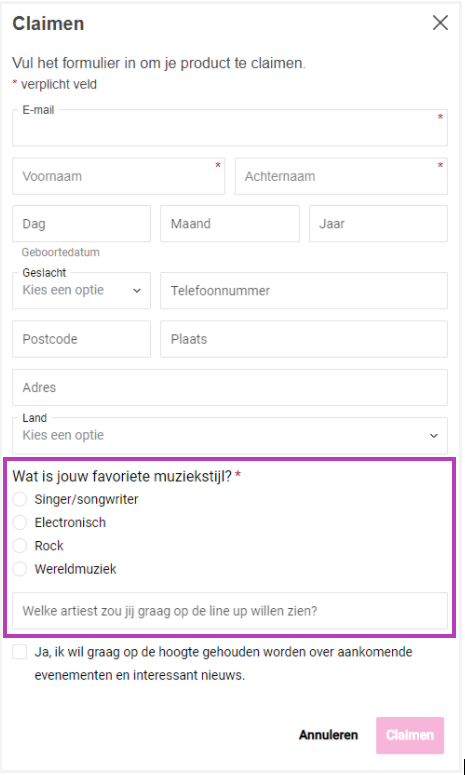
4. Click 'New question'. Choose which type of question or text you want to show and whether it is mandatory to answer.
- Label: A piece of text without choices for the consumer, for example an introduction or explanation.
- Short text: A question the consumer can answer with a short piece of text.
- Long text: A question the consumer can answer with a longer piece of text.
- Checkbox: A question for which the consumer can tick one answer.
- Checkbox group: A question for which the consumer can tick multiple answers.
- Radio button group: A question for which the consumer can tick one answer, but with multiple options available.
- Dropdown list: A question for which the consumer can select an answer from a dropdown list.
- Date: A question for which the consumer can answer with a date.
 Attention: After creating a questionnaire it is possible to modify it. Only do this if it has not yet been used and no answers have been given, to prevent data loss.
Linking a questionnaire to an event
5. Go back to 'Events' and select the desired event.
6. In the light grey menu, go to 'Tools > Questionnaire'. Then click 'Add questionnaire to event'.
7. You can now add your created questionnaire. The questionnaire must be linked to a point of sale (i.e. ticket shop) and you can optionally activate it for specific products. When activated for specific products, you can choose whether the list is shown once per order or repeatedly for each unit of the product.
8. Finally, click 'Save changes' once everything is configured. Open the ticket shop and click through to checkout to test the questionnaire.

You can easily download the results of your questionnaire as CSV or Excel via 'Reports -> Event -> Questionnaires'.
Linking a questionnaire to desired products for personalization
Once your questionnaire has been created, it only needs to be linked to the desired products. Follow the steps below.
- Click 'Manage' at the top and select the desired event.
- Under 'Event settings', navigate to 'Personalized tickets'.
- Check whether 'Activate Send to friend' is ticked and scroll to the 'Products' section.
- If needed, select the products for which personalization should be active. Then add the desired questionnaire under 'Custom form'.

Tip: in the 'Consumer fields' section you can further specify which standard information is requested in personalization.
Related Articles
Selling personalized tickets (name-based tickets)
Personalisation gives you insights into who your fans are. In addition to the details of the main buyer, this feature lets you map out all visitors to your event. This not only provides unique insights, but also gives you the opportunity to build or ...What information do you ask from the consumer?
Research has shown that fewer (required) fields in the checkout increase conversion. Decide for yourself how much information you want to ask from your visitors by following the steps in this article. 1. In the grey bar on the left, open “Create” 2. ...Promote ticket resale from the ticket shop
Introduction When fans are not able to attend an event, there are various players in the market that enable resale. In these articles (1. Waiting list | 2. Resale platform) you can already read which options See Tickets offers to take back control ...Encourage fans to buy add-ons with upselling
There are two ways to offer add-on products: Upsell at checkout – in this case, fans will see the upsell products when they have added products to their shopping cart. For example, a locker will be shown at checkout if there is only an entrance ...Show recommended products in your shop with Dynamic Shopping
Dynamic Shopping is a useful tool that makes recommended products visible to fans during the purchase process. Below you will find the steps to set up Dynamic Shopping in your shop. 1. Activating Dynamic Shopping Have you never used Dynamic Shopping ...